Freeze-dried or dehydrated food for hiking - What's the difference?
When hiking, traveling, or preparing for emergencies, food is not just a way to satisfy hunger. The quality of your food directly affects your well-being and energy levels, so it can be crucial when it comes to your ability to successfully climb a mountain or even survive in harsh conditions.
The method of preparing and storing food significantly affects its weight, convenience, nutritional value, and taste. In this article, we'll compare the most popular food preparation methods for hiking, traveling, and emergencies.
1. Freeze-dried/freeze-dried food
How to prepare freeze-dried/freeze-dried food
The food is flash frozen, then the water is removed from it in a vacuum through a process of sublimation (water in the form of ice turns directly into steam).
Freeze-drying is the most modern method of preparing hiking food, as it best preserves the taste and nutritional value of the food and ensures the greatest weight reduction.
Advantages:
- Very light (up to 90% lighter than the original weight);
- Excellently preserves flavor, texture and nutrients;
- Long storage life (up to 10 years);
- Quick and easy preparation (just add hot water).
Disadvantages:
- High costs caused by high energy consumption and time-consuming production process;
- Hot water is needed for rinsing.
Suitable for: Long hikes, mountain expeditions, long-term emergency food storage.
Examples of freeze-dried foods:
Freeze-dried food Good Mood Meals pasta with chicken
2. Dehydrated food
How is dehydrated food made?
The food is gently heated to evaporate the moisture.
Advantages:
- Light weight
- Cheaper than freeze-dried foods due to lower energy consumption
- Wide selection of dishes
Disadvantages:
- Lower nutrient retention than lyophilization;
- Firmer texture after restoration;
- Hot water is needed for rinsing.
Suitable for: Economical hiking, traveling, emergency preparations.
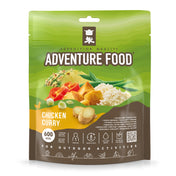
Product examples:
3. MRE (meals ready to eat)
How MRE food is prepared
MRE meals are prepared and placed in special laminated bags, which are sealed and heated to ~120°C under pressure (similar to canning). This process destroys microorganisms, ensuring a shelf life of 3-5 years. MRE meals are packaged in multilayer plastic-foil packages.
MRE food packaging can be heated in several ways:
- place a closed package in hot water,
- heat in a pan,
- use a self-heating kit - with the help of water, a chemical reaction (magnesium + water) is activated, which releases heat and warms the food.
Advantages:
- Preserves the natural taste and consistency of food well;
- Fully prepared meals that can be eaten without heating in emergency situations.
Disadvantages:
- Heavier than freeze-dried or dried foods;
- Shorter shelf life (2–5 years).
Suitable for: Short hikes, car travel, home emergency supplies, occasions when it is not possible to use a fire or gas stove.
Examples of MRE meals:
Adventure Menu MRE Beef Goulash
5. Canned foods
How it works: Food is prepared and hermetically sealed in cans, preserving freshness through sterilization.
Advantages:
- Very long shelf life (5 years or more);
- Ready for immediate use;
- Economically beneficial.
Disadvantages:
- Heavy and bulky;
- Fewer nutrients due to heat treatment;
- Waste disposal needs to be addressed.
Suitable for: Emergency supplies, road trips, home pantries.
By choosing the right food preparation method, you can ensure optimal nutrition, convenience, and enjoyment during your adventures or emergencies.


